Introduction
A static bucket covers a lot of ground, but the moment you want server-side code, a database, or just full control over the box, you want a VM. The trade is more setup for more flexibility. Here we do it by hand through the Atlas web console so you can see each piece: the VM gets created, Apache goes on it, your files get copied over, and a domain points at it. The Website hosting on a static S3 bucket guide is there if a plain static site turns out to be all you need.
For infrastructure-as-code: See Website hosting with Terraform for automated deployment with version control and remote state management.
Prerequisites
All you really need is an Atlas Cloud account and enough comfort with SSH to log into a server and run a few commands. A registered domain is nice if you want a real address instead of a bare IP, but it’s optional.
Step 1: Create a Virtual Machine
If you’ve never created a VM here, Creating your first cloud service covers it start to finish; Instances and Guest Networks go deeper on the pieces below.
Log in to the Atlas Cloud Platform. You’ll need a guest network to attach the VM to, so create one first if you don’t already have it (see Guest Networks). One thing to remember about a fresh isolated network: it blocks egress by default, so allow egress traffic on it before you expect the VM to reach anything outside.
With a network in place, click “Add Instance” and fill in the VM. Call it web-server, pick the Ubuntu 24.04 LTS template, and attach the network you just made. Sizing is the only real decision here. A small site is happy on Atlas.a4 (1 vCPU / 4 GiB); if you expect traffic or want room to run a database alongside, Atlas.a5 (2 vCPU / 8 GiB) buys headroom. The console dropdown lists what your account can launch, as does cmk list serviceofferings. Launch the VM once the form looks right.
Step 2: Assign a Public IP and Configure Firewall
The VM has no public address yet, so the internet can’t reach it. Acquire one under Networking > Public IP Addresses. After that, the firewall needs attention in both directions before anything works.
Inbound web traffic needs two things that have to agree with each other: a port-forward rule and a matching ingress rule. Forward TCP public port 80 to private port 80 on your web-server instance, do the same for 443 to 443, then add ingress rules that permit HTTP and HTTPS from the internet. Miss either half and the site simply won’t load, which is a common first stumble.
Then there’s outbound. A fresh isolated network won’t let the VM talk to anything until you open egress, so apt, DNS lookups, and Let’s Encrypt all fail silently. Under the network’s Egress rules tab, allow the VM out to 0.0.0.0/0 on HTTP (TCP 80) and HTTPS (TCP 443) for packages and certificates, and on port 53 over both UDP and TCP so DNS resolves.
Step 3: Connect to Your VM
SSH in over the public IP using your key (see SSH Key Pairs). The login name depends on the template, it’s usually ubuntu for Ubuntu images, and root or rocky for others:
ssh -i ~/.ssh/id_ed25519 ubuntu@<public-ip>First thing once you’re in, pull down the latest packages so you’re not building on a stale system:
sudo apt update && sudo apt upgrade -yStep 4: Install a Web Server
Apache is the web server here; it’s in Ubuntu’s repos, so installing it is one command:
sudo apt install apache2 -yStart it now and enable it so it survives a reboot:
sudo systemctl start apache2
sudo systemctl enable apache2
A quick status check confirms it came up:
sudo systemctl status apache2Step 5: Create and Upload Your Website Files
Apache serves whatever sits in /var/www/html, so the job now is just getting a page in there. If you already have a site, use that; otherwise this throwaway index.html is enough to prove the chain works end to end:
<!DOCTYPE html>
<html lang="en">
  <head>
    <meta charset="UTF-8" />
    <meta name="viewport" content="width=device-width, initial-scale=1.0" />
    <title>Welcome to Atlas Cloud</title>
    <script src="https://cdn.tailwindcss.com"></script>
  </head>
  <body class="bg-gray-100 flex items-center justify-center min-h-screen">
    <div class="text-center">
      <h1 class="text-4xl font-bold text-blue-600 mb-4">
        Hello from Atlas Cloud! ☁️
      </h1>
      <p class="text-lg text-gray-700">
        Your website is live and looking great on Atlas.
      </p>
    </div>
  </body>
</html>
Copy it up to the web root with SCP:
scp -i ~/.ssh/id_ed25519 ./index.html ubuntu@<public-ip>:/var/www/html/Step 6: Test Your Website
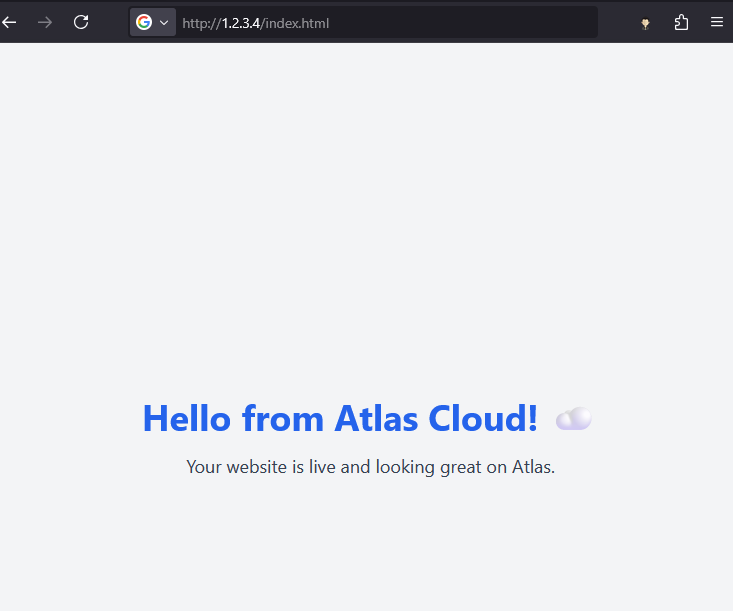
Point a browser at http://your.ip.address and the page should render. That’s the whole pipeline working: public IP, port forwarding, firewall, Apache, and your file, all lined up.
Optional: Configure Your Domain
Serving from a bare IP works, but a domain reads better. In your registrar’s DNS panel, add an A record for @ pointing at the public IP from the Atlas console. DNS changes don’t take effect instantly; how long depends on your registrar’s TTL, so give it some time and then load the domain to confirm it resolves to your VM.
Optional: Add SSL with Let’s Encrypt
At this point the site is plain HTTP. Let’s Encrypt issues the certificate and Certbot wires it into Apache for you. Install Certbot first:
sudo apt update
sudo apt install certbot python3-certbot-apache -y
Then ask it for a certificate. The flags below run it unattended and set up the HTTP-to-HTTPS redirect in one go:
sudo certbot --apache -d yourdomain.com --non-interactive --agree-tos --email your-email@example.com --redirectCertbot installs a timer that renews the certificate before it expires. Confirm it’s active:
sudo systemctl status certbot.timerNote: For automated infrastructure deployment, see Website hosting with Terraform for an IaC approach that includes SSL setup.